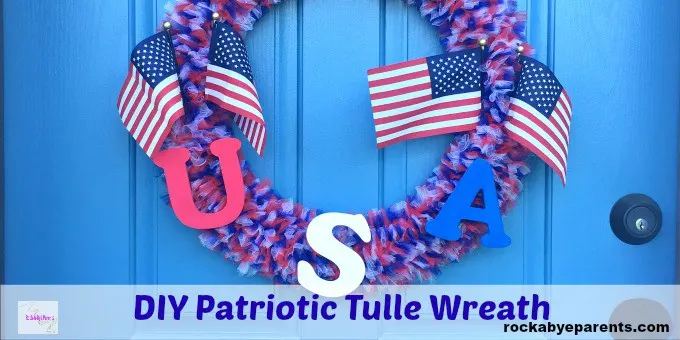
I would say that I am a fairly patriotic person, and I love to decorate my home for the holidays. Several years back I never decorated my home for the 4th of July though. That was until I made this patriotic tulle wreath.

DIY Patriotic Tulle Wreath
Disclosure: This post contains affiliate links. As an Amazon Associate I earn from qualifying purchases.
I love hanging wreaths on my front door. Creating my own patriotic wreath seemed like the best place to start for giving my home a patriotic feel.
This was the first tulle wreath on a wire frame that I ever made. I really wasn’t sure what I was doing, but I did a little research for ideas and created my own fun technique and design.
I love how the wreath turned out. The letters were something that I decided to add just before I had fully finished the wreath. The flags didn’t seem to be enough, and I was worried that they might not look quite right by themselves. The letters really helped the flags pop visually, and I think they give the wreath a more finished look.
I have to admit that it took a lot longer to make the wreath than I had expected. It takes some time to cut up all of the tulle and to tie each piece on. It is a great mindless task though, so it was something that I could do while watching TV.
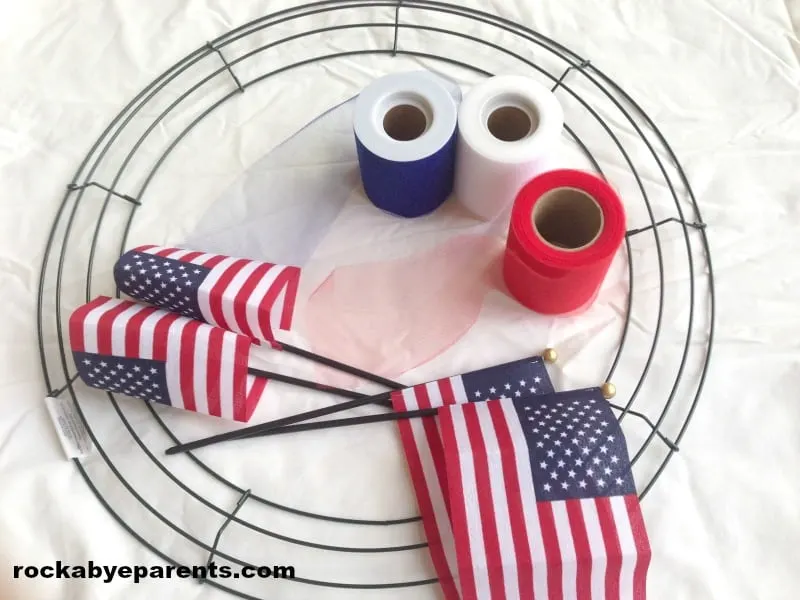
Supplies Needed to Make a Patriotic Tulle Wreath
- 18in Wire Wreath
- Red Tulle
- White Tulle
- Blue Tulle
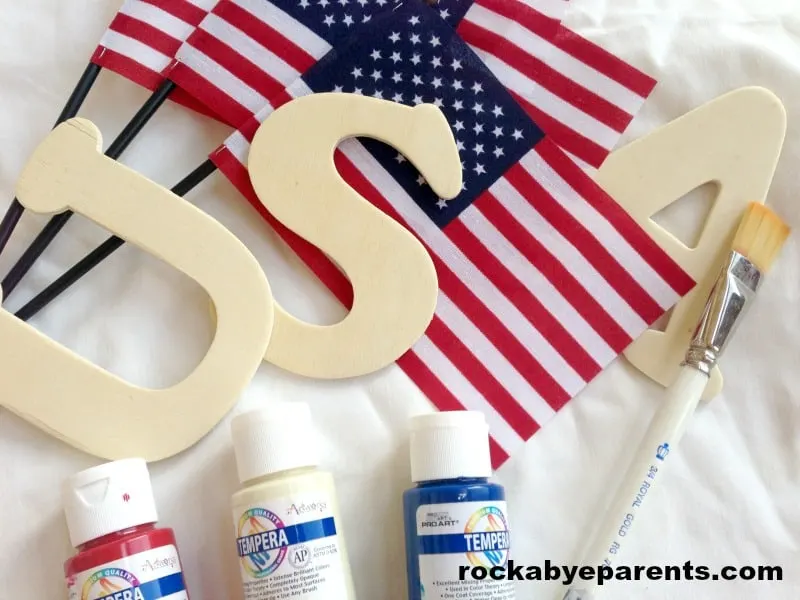
- Small American Flags
- Wooden Letter “U”
- Wooden Letter “S”
- Wooden Letter “A”
- Red Tempera Paint
- White Tempera Paint
- Blue Tempera Paint
- Paint Brushes
- Scissors
- 12in Ruler
- Hot Glue Gun
How to Make a Patriotic Tulle Wreath
While this wreath can take a bit of time to make, it is simple to do. There are actually many ways than you can go about this craft. I like to cut one round of tulle and then attach it as I go. You may find it easier to cut a lot of tulle up before attaching any of it. Whatever is easiest and fastest for you is great.
Cutting the Tulle
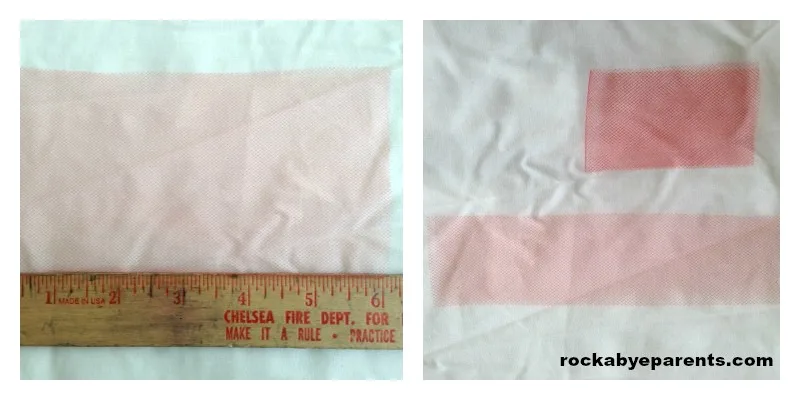
The first thing that I do is trim a length of tulle for my needs. If you can find 3 inch wide tulle then you can save yourself a step. Over the years I’m finding it harder to find that size in the colors that I need. Instead I buy it in a 6 inch width and cut it in half. You should be able to complete the wreath with only one spool of each color of tulle if you get a 6 inch width. If you get a 3 inch width you’ll need 2 spools of each color.
You need to cut the tulle into 12 inch length pieces. I measure it with a ruler and cut at the 12 inch mark. You do not need the cut to be perfectly straight, so don’t worry about being precise.
At this point, if you’re using a 6 inch width, you need to cut the tulle width in half to make it a 3 inch width. To do this fold the tulle up so that it is still a full 12 inches long. For those of you that know what I mean you need to do a hot dog fold. Then cut along the fold. Again you don’t need to be precise about the cut.
Now you need to cut the length in half, so a hamburger fold. Again you’ll cut the tulle right along the fold. Then fold each tulle piece width wise one more time (another hot dog fold) and cut on the fold. When everything is done you’ll have tulle pieces that are 1.5×6.
Attaching the Tulle
Now you could continue to cut a lot of tulle up and then come back to this step once you’re done cutting. If you’re like me you can now attach the pieces that you’ve just cut up.
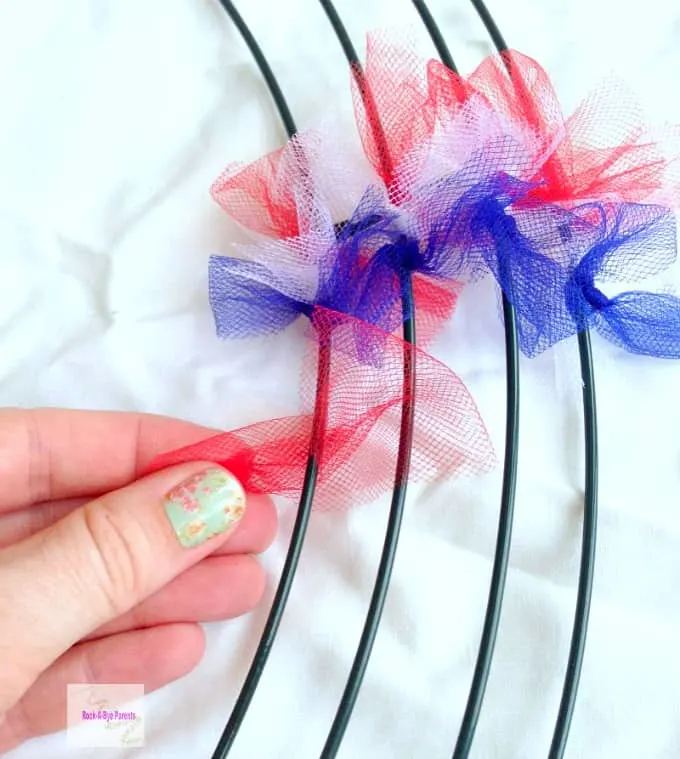
Attaching the tulle is pretty easy. First you need to fold a piece of your 1.5×6 tulle in half. Now you’re 1.5×6 piece should be a 1.5×3 piece. Once you have it that size you’ll put it under one of the wire rims of the wreath frame and tie the tulle in a single knot.
The wreath frame that I chose had 4 different rings. I attached the tulle pieces in a straight line, so I did four of each color (1 piece for each wire ring). Then I changed to colors for the next row. I went in the order of red, white, and blue. It doesn’t really matter which color order you use as long as you keep the same pattern.
Decorating the Wreath
Once you have finished attaching the tulle to the entire wreath it’s time to add the embellishments.
To start you’ll need to paint the wooden letters. I recommend taking the time to paint the top of the letters as well as the sides. Otherwise you’ll see wood unless you’re directly in front of the wreath.
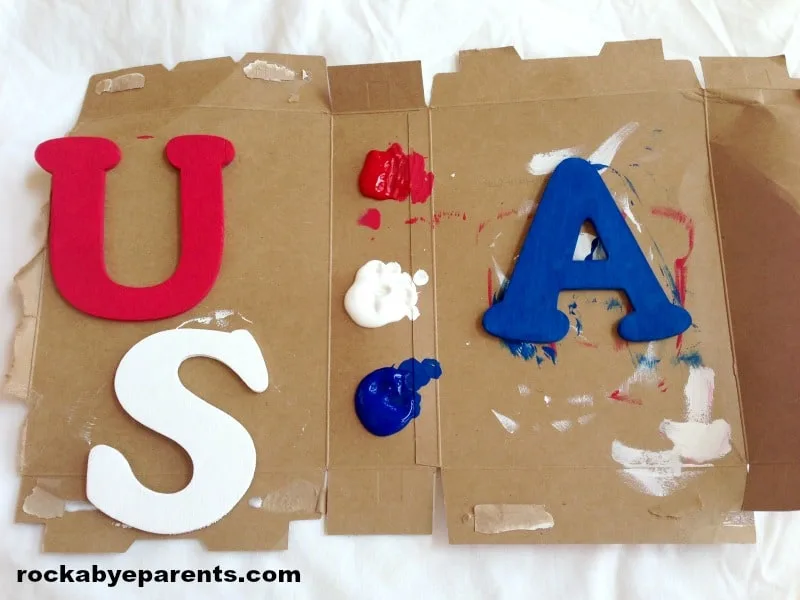
Once the painted the letters are dry you can finish the wreath by attaching the letters with hot glue. I would lay them down on the wreath and play with the spacing you would like before you attach any of the letters. Then just lift them up, add some hot glue, and put them right back where you had them.
More Patriotic Crafts and Recipes
- 4th of July Crafts for Kids Round Up
- 21 Day Fix 4th of July Recipes
- American Flag Bead Pin
- Patriotic Berry Yogurt Parfait with Honey
Hang Your Patriotic Tulle Wreath
Now that you have your wonderful wreath do you need a way to hang it? Check out these different options from Amazon!

16 of the Best 4th of July Wreaths - The Frugal Navy Wife
Monday 18th of July 2016
[…] DIY Patriotic Tulle Wreath – Rock a Bye […]
15 DIY Patriotic Crafts - Thrifty Mommas Tips
Friday 1st of July 2016
[…] DIY Patriotic Tulle Wreath via Rock-A-Bye Parents […]
18 DIY Patriotic Wreaths - Mom Knows It All.
Thursday 30th of June 2016
[…] DIY Patriotic Tulle Wreath […]
10 Patriotic Wreaths for the 4th of July -
Monday 27th of June 2016
[…] https://www.rockabyeparents.com/diy-patriotic-tulle-wreath/ […]
28 DIY Patriotic Decorations | The Gracious Wife
Wednesday 8th of June 2016
[…] DIY Patriotic Tulle Wreath from Rock-A-Bye […]